Over the semester, I embarked on a journey to spend more time creating art. Art has always been an important part of my life, as I come from a very artistic family where creativity was always encouraged. Growing up, we often made art together, and even today, it remains a meaningful way for us to connect. This personal connection to art has always been a source of joy, but during this semester, I wanted to be more intentional about dedicating time to my creative practice.
I found that setting aside time for art projects provided a much-needed break from schoolwork, allowing me to create a better balance between academics and personal well-being. Engaging in creative expression helped me decompress and reset, making my overall school experience more enjoyable and manageable. It reminded me of the importance of nurturing hobbies alongside responsibilities.
Another rewarding aspect of this process was finally putting my extensive collection of art supplies to use. Over the years, I have accumulated a variety of materials, from paints and pastels to markers and mixed-media tools. Experimenting with different mediums allowed me to explore new techniques and rediscover my love for hands-on creativity.
Throughout this journey, I also found inspiration from various online platforms. Watching YouTube tutorials, scrolling through Pinterest, and exploring TikTok videos introduced me to new ideas and approaches I might not have considered on my own. These resources not only sparked creativity but also provided guidance on how to bring my ideas to life. Whether it was learning a new painting technique or discovering a fresh way to use collage, these platforms played a key role in shaping my artistic exploration.
Overall, this inquiry into making more time for art reaffirmed how much creativity enriches my life. It has reminded me of the joy of making, the importance of balance, and the endless possibilities that come with exploring new artistic avenues. I plan to continue prioritizing art in my life, not just as a form of self-expression but also as a way to stay grounded and inspired.
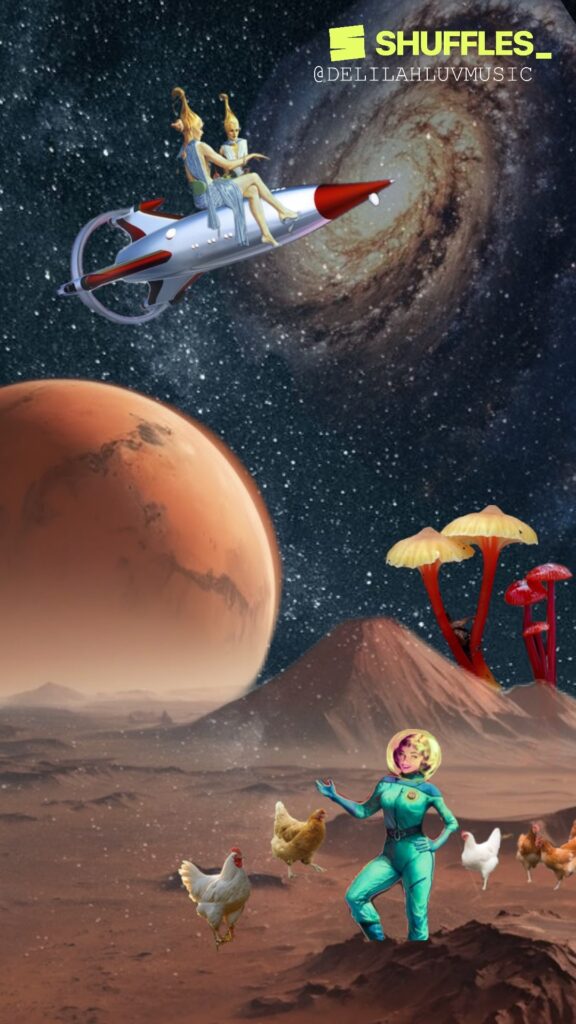
Today, I explored using the app Shuffles on my phone to create digital collages. Shuffles is a creative app by Pinterest that allows users to combine images, text, and stickers to design unique visual compositions. One of the features I enjoyed was the ability to cut out elements from photos easily and layer them to create dynamic collages. The app also offers animations, effects, and the ability to remix other users’ collages, making it a fun and interactive tool for digital creativity.
Materials:
A smartphone or tablet with the Shuffles app installed
Access to Pinterest (optional for saving and importing images)
A collection of photos, stickers, or text ideas for the collage
Steps:
Open the App – Launch the Shuffles app and sign in or create an account if needed.
Gather Images – Import images from your phone’s gallery, search on Pinterest, or use the app’s built-in sticker library.
Cut Out Elements – Use the auto cutout tool or manually select areas of images to remove backgrounds and isolate subjects.
Arrange & Layer – Drag, resize, and rotate elements to compose your collage. You can layer multiple images for a textured effect.
Add Effects – Experiment with shadows, animations, and blending modes to enhance the collage.
Include Text – Add quotes, captions, or keywords using different fonts and styles.
Save & Share – Once satisfied with the design, save it to your device or share it directly on Pinterest and social media.
For my first collage, I used images from my phone featuring me, my partner, and my cat, Pokku! For my second collage, I drew inspiration from textures, layering different elements to create a rich, tactile feel. For my final collage, I explored an outer space theme. I found that Shuffles is an excellent tool for experimenting with digital art, and I’m excited to explore more ways to integrate it into creative projects!
For our final project, we created a podcast to help teachers and parents navigate internet safety! This call-in style podcast was a super fun to make, and along the way, we gained valuable insights into teaching online safety. We also explored helpful resources that we can incorporate into our own classrooms to support students in developing safe and responsible digital habits!
Sabrina: Hello and welcome back to another episode of Teachers Teach Tech, we are your hosts Sabrina, Delilah and Chantale. Today we wanted to hear from you, our listeners, to answer your pressing questions about how to teach students about online safety and responsible digital behaviour.
Delilah: How this will work, we will be using a phone-in method to receive and answer your questions live! The phone number we will be using today is in our show notes if you scroll down on your phone or any device you are using.
Chantale: Without further due, let’s open the lines!
***Phone rings to radio show***
Sabrina (educator?): Hello? What problem can I help you with today?
Parent (Chantale): Hi, I am calling as a concerned parent. I am really worried about my kid’s phone safety. They just got their first smartphone, and I don’t even know where to start. I’ve heard so much about the potential dangers they could face online, and I just want to make sure they are safe. Also, you should know they are in middle school right now. Could you give me some advice on that?
Sabrina: I would love to help you with that! Let’s start with a few important steps. First of all, one of the easiest things you can do is make sure that the geotagging function on their phone is turned off for their videos and photos. This helps prevent their location from being shared on their social media. This way, people online won’t know where they are.
Chantale: Wow, I hadn’t even heard of geotagging. How do I go about doing that?
Sabrina: You can usually disable it in the camera or photo app settings. It should be under privacy or location services. Another good step is making sure that your child’s phone is locked with a password or face recognition to make sure that no one is going on there without you or your child knowing.
Chantale: Sounds good, what about being able to find their location so I know they are safe?
Sabrina: If they have an iPhone, you can turn on “Find My” or if you have an android you can use “Google’s Family Link”. These can help you track your child’s location with their device.
Chantale: That is good to know. What about emergencies? Is there any way to be better prepared for an emergency?
Sabrina: One easy thing you can do is have their emergency contacts labeled as I.C.E. which stands for in case of emergencies. If you have their emergency contacts labeled correctly it can help someone who might need to access their phone quickly to know who to call. Another subject that we should discuss is permission settings. Whenever you log into an app or onto a website that you haven’t been to before, it is likely that it will ask you to accept permissions or cookies, and I don’t mean the good kind. These are different but it’s important to understand what they mean. Apps will often ask for permission to access your photos or data and send the data to companies who pay for it.
Chantale: I had no idea, thank you. I was thinking about creating a list of house rules for cellphone use. Do you have any suggestions?
Sabrina: Absolutely I do. Before I go into those though, it’s also important to remember to turn on safe search for their browser so they won’t be allowed to see inappropriate images and other bad stuff. For ideas on possible house rules I would start with making sure they get their parents permission before giving their personal data away to anyone they might meet online. There are some online communities where adults and children might interact, and your child might not even know they aren’t talking to another child but to an adult. One of these sites is Roblox.
Another rule I would use is not visiting websites that your child knows you wouldn’t approve of. Also, not sharing passwords with anyone but their parents is important. As well as, not meeting friends they might have found online, especially without parents there. This is especially dangerous as they could possibly be kidnapped. Only go with the parent, to make sure that it really is an age-appropriate friend, who is hopefully there with their parent as well. Make sure your child remembers that the person on the other side of the screen is human too and can easily have their feelings hurt by things that your child says. Lastly, things on the internet are usually there to stay so it’s important that your child understands that what they write or post on their social media may have consequences that last a lifetime. So, if your child isn’t sure that what they want to post is okay, maybe they should check in with their parents before posting.
Chantale: Those are all great points. Thank you for your time. I feel much more confident in how to manage my child getting their first smartphone.
Sabrina: Thanks for calling!
***Hang up call***
***Phone rings to radio show***
Delilah (Educator): Hello! What can I help you with today?
Teacher (Sabrina): Hi, I’m calling because I want to help my students recognize and respond to online threats like cyberbullying. What are some effective ways to teach this?
Delilah: Great question! Start by defining cyberbullying in simple terms. Use real-life examples, like teasing that becomes hurtful, sharing personal information without consent, or excluding someone online. Even jokes can be harmful if they embarrass or isolate someone.
Teacher: That makes sense. How can I make it engaging for students?
Delilah: Role-playing works well! Create scenarios where students take on roles like the bully, victim, or bystander, and discuss their feelings and responses. For younger kids, use puppets or story-based activities. For older students, real-life cases or media examples spark great discussions.
Teacher: I love that! How do I encourage students to speak up if they are being cyberbullied?
Delilah: Reinforce that reporting cyberbullying isn’t tattling—it’s about protecting themselves and others. Create a safe space where they feel comfortable speaking up.
Teacher: That’s really helpful! I also want to talk about privacy, passwords, and personal info. How should I approach that?
Delilah: Compare online privacy to real-life examples—like keeping a diary locked or not sharing home addresses with strangers. Teach them to create strong passwords using letters, numbers, and symbols, and play a “Password Strength Challenge” to make it fun. Also, remind them to check privacy settings. and use two-factor authentication.
Teacher: Those are great strategies! Thank you for your advice.
Delilah: Happy to help! Thanks for calling!
***Phone rings to radio show***
Chantale: Alright, we have our next caller. You’re on the line with (podcast hosts)! What question do you have for us today?
Teacher (Delilah) : Hi, thanks for taking my call. I’m a teacher in a grade 4/5 class, and I have to teach a unit about online safety, but I don’t know where to start! This is my second year teaching, and I haven’t had to teach an online safety unit yet.
Chantale: No worries at all. That is why we are here to help! We can provide you and all our viewers with great online resources to start and build your collection of resources on this topic. All the resources mentioned in this episode will be compiled into a document and can be found on our website after the end of the episode! Anyways, where to start for resources? Well, the BC Ministry of Education and Child Care offers a guidebook document highlighting various topics for teachers to teach and support students’ health, including a section about internet safety.
Teacher: Wow, really!? I had no idea!
Chantale: Yes, they offer many guidebooks and documents on various topics. Another resource for teachers is Common Sense Education, a free online resource for teaching many internet safety concerns. For example, they have lessons and activities that help students build their tech digital citizenship from kindergarten to grade 12.
Teacher: Free, and lessons are already planned; I’m sold!
Chantale: Exactly! It makes teaching digital literacy and online safety much easier and not nerve-racking. Now, let’s give you some fun resources to engage students in your teaching content! Multiple platforms offer games; one is Net Smartz Kids, a website with many games and videos to teach kids about cyberbullying, online predators, and privacy. I encourage parents and guardians of the students in your class to participate in these interactive online activities to learn alongside their child, as this is also new for parents and guardians.
Teacher: Oooh, yes, very true; I will try them out!
Chantale: Yes, that is a great idea! Before we let you go, we would like to share two other online resources. First is Zoe and Molly Online, a website run by the Canadian Centre of Child Protection Inc., designed to educate elementary-level children about internet safety through fun games, comic books, interactive activities, and quizzes. The second is Interland by Google. It’s a website designed by Google for children 7 to 12 years old to learn about digital citizenship through action-packed games and interactive activities. Google also offers the website Beinternetawesome.with.google.com. It’s a free program that teaches kids about internet safety, and that’s where you can find Interland!
Teacher: Amazing! Thank you so much for all your help! I now know exactly where to start!
Chantale: Perfect! Happy to help!
End: That wraps up our podcast! Thanks for joining us on Teachers Teach Tech! We will see you next week!
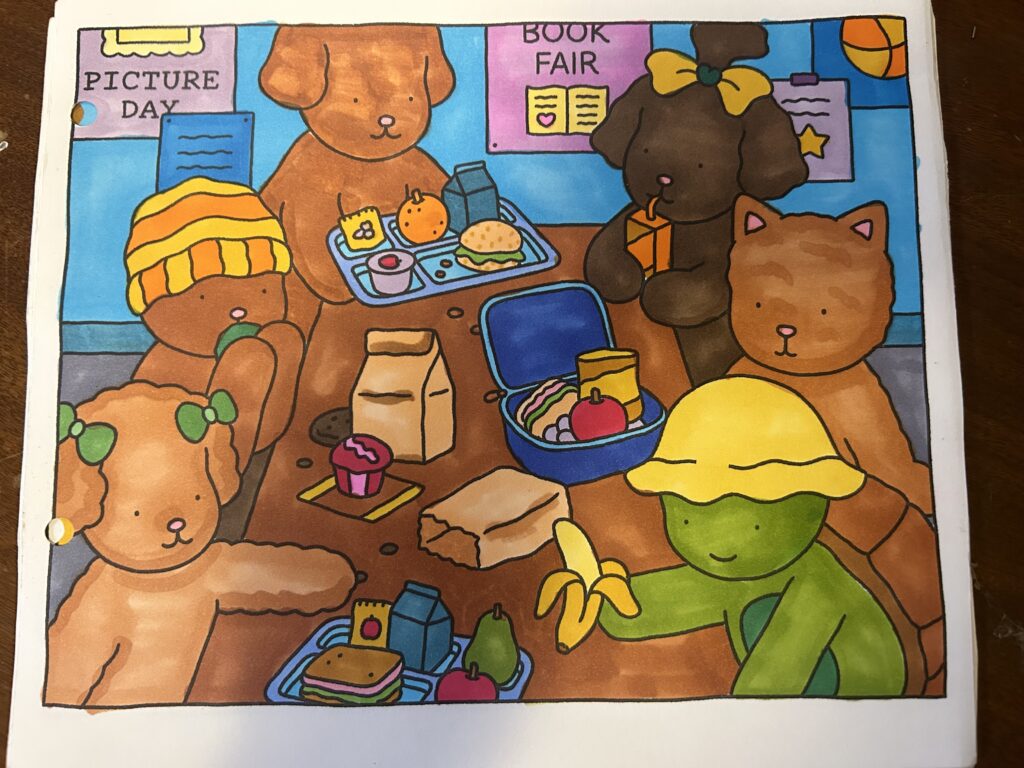
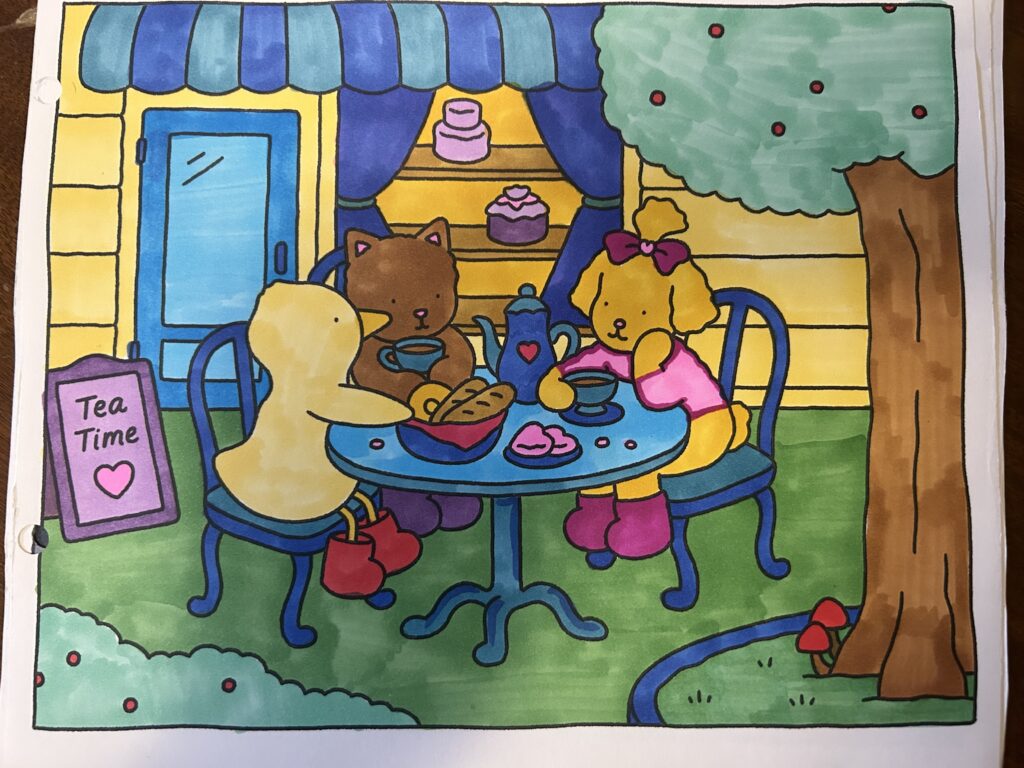
Over the last little bit, I have been doing colouring books!
Why Colouring Books?
Coloring books are a great way to relax and unwind. The repetitive motion and focus on colors can be very calming, helping to reduce stress and promote mindfulness. It’s also a fun way to express creativity without the pressure of creating something from scratch!
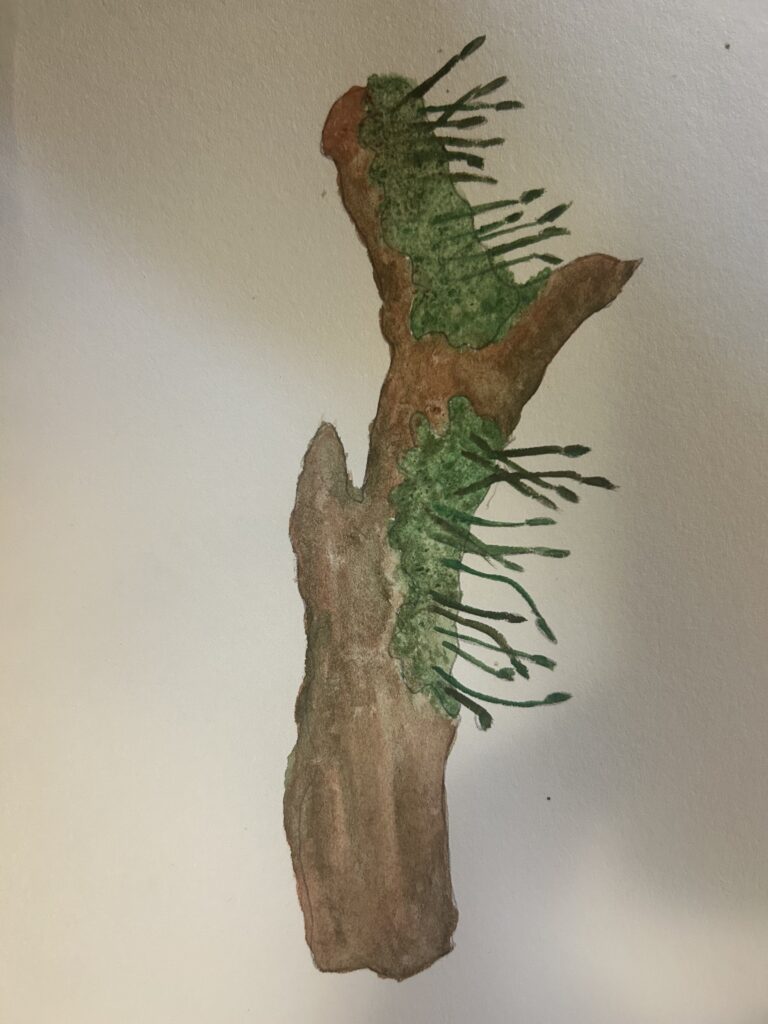
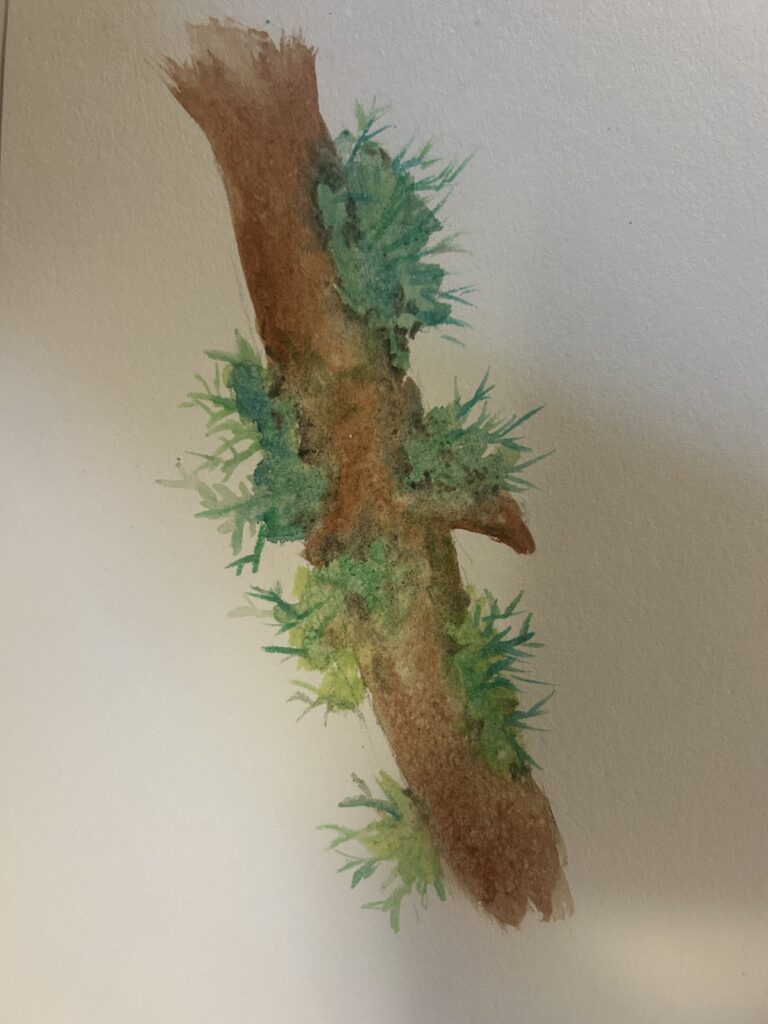
This week, I was inspired by nature to create some watercolour paintings!
What is Watercolour?
Watercolour is a painting technique that uses pigments mixed with water to create soft, transparent layers of colour. It is known for its fluid and delicate effects, allowing artists to blend and layer colors beautifully.
Materials
Watercolor paper
Watercolor paints
Paintbrushes (round and flat)
A cup of water
Paper towel or cloth
Pencil (for sketching)
Palette (for mixing colors)
Steps
Sketch your subject – Lightly draw your design on watercolor paper.
Prepare your colors – Mix your watercolor paints with water on the palette.
Start with light washes – Apply the lightest colors first, letting each layer dry before adding more details.
Build up layers – Gradually add darker colors and details for depth.
Add finishing touches – Use a fine brush for highlights and small details.
Let it dry – Once finished, allow your painting to dry completely before handling.
For my paintings, I chose to capture the beauty of snowberries, moss, and lichens. Each element reflects the intricate textures and colours found in nature, making them perfect subjects for watercolour exploration!
This week, we were prompted to reflect on what the future holds. To begin, I explored how people in the 1950s-1980s envisioned the world of the 2000s.
The image above comes from Arthur Radebaugh’s Closer Than We Think comic strip, published on December 18, 1960. It envisions a future where technology transforms education, potentially replacing traditional classrooms with home-schooling consoles. This vision feels particularly relevant today, as it echoes the reality of online learning during COVID, when platforms like Zoom turned homes into classrooms.
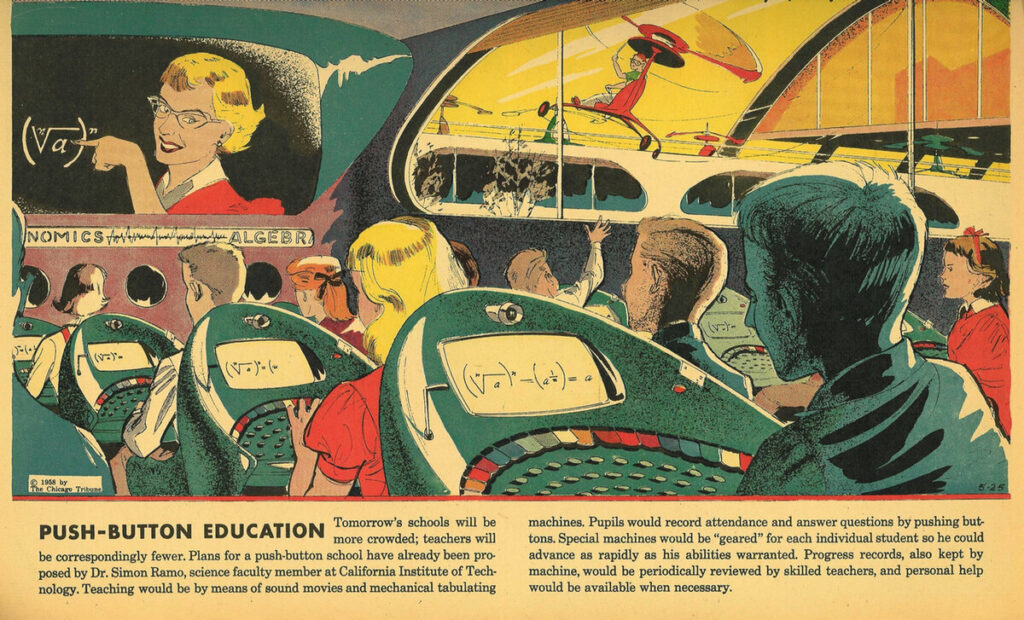
The image above comes from the May 25, 1958, edition of Arthur Radebaugh’s Sunday comic strip, Closer Than We Think, which envisioned a high-tech school of the future. This concept aligns with modern ideas of personalized learning, where students can progress at their own pace, accessing digital resources and lessons tailored to their needs.
The 1982 book The Whole Kids’ Future Catalog promised children of the 1980s that floating schools would be the classrooms of tomorrow, allowing students to travel together and explore the world firsthand. While physical floating schools have yet to become mainstream, modern technology has made global learning more accessible than ever.
With tools like Zoom, Google Earth, and YouTube, education is no longer confined to four walls. Students can take virtual field trips to historical sites, explore distant ecosystems, and connect with classrooms across the globe—all from their own desks. The dream of learning beyond the classroom has, in many ways, become a reality, just in a different form than originally imagined.
My hopes for the worlds future
I hope the future will be one where we stay deeply connected—with each other and with the natural world. A future where we learn from one another, embracing diverse perspectives that enrich our shared experiences. I envision continued progress in truth and reconciliation, where understanding and healing flourish. It’s a future where we live in harmony, not only with each other but with the environment that sustains us. Above all, I hope it’s a future built on joy, love, and a sense of community that brings people together to create a more compassionate and sustainable world.
I asked Chatgpt to create an image of 2025 with these prompts:
Staying connected—with each other and with nature
Learning from one another and embracing diverse perspectives
Continued progress in truth and reconciliation
Living in harmony with both people and the natural world
A future built on joy, love, and community
Overall, I really like this image and the idea of a future that could resemble it. While I don’t think our future will look exactly like this, the vision is peaceful and inspiring. I especially appreciate the emphasis on green spaces and the sense of community—it evokes a feeling of connection and harmony that I hope we can work toward, even if it’s not a perfect reflection of the future.
Challenges Ahead
I worry that the future may see a decline in human connection due to our increasing reliance on digital technology. While technology has brought many benefits, it often distances us from genuine face-to-face interactions, potentially leaving us feeling more isolated. I’m also concerned about the ongoing mental health crisis, which seems to be growing in intensity and affecting more people each day. The pressures of modern life, combined with social media, may exacerbate these challenges. Additionally, I fear that continued conflict and resource-driven greed will persist, creating more divisions between communities and nations.
I asked Chatgpt to create an image of 2025 with these prompts: Generate the year 2055 that reflects this: A decline in human connection due to digital reliance An ongoing mental health crisis Continued conflict and resource-driven greed.
I was really struck by this image because it closely resembles our world today. Now more than ever, people are constantly glued to their phones, often unaware of the people around them. There’s a noticeable lack of nature and green spaces, and instead, we see an overwhelming number of buildings.
The Future of Teaching
I envision a future in education where the integration of AI and virtual reality enhances learning experiences, making them more interactive and immersive. There will be a stronger focus on student-centered learning, where each student’s unique needs, interests, and strengths are prioritized. This shift will also bring greater inclusivity and accessibility, ensuring that all learners, regardless of their background or abilities, have equal opportunities to thrive. Additionally, I hope to see Indigenous knowledge and principles deeply embedded in the curriculum, fostering a more holistic understanding of the world and honouring the rich traditions and wisdom of Indigenous cultures.
Above is an image generated by ChatGPT, based on the description I provided earlier, has left me with mixed feelings. While I can appreciate the futuristic aspects of it, I’m not entirely sure how to feel about the heavy emphasis on virtual reality (VR). The intensity of the VR presence in the image feels somewhat overwhelming, and I’m not sure it fully aligns with my vision for classrooms. However, I can also see how this kind of technology might shape future classrooms, blending digital tools with traditional learning methods.
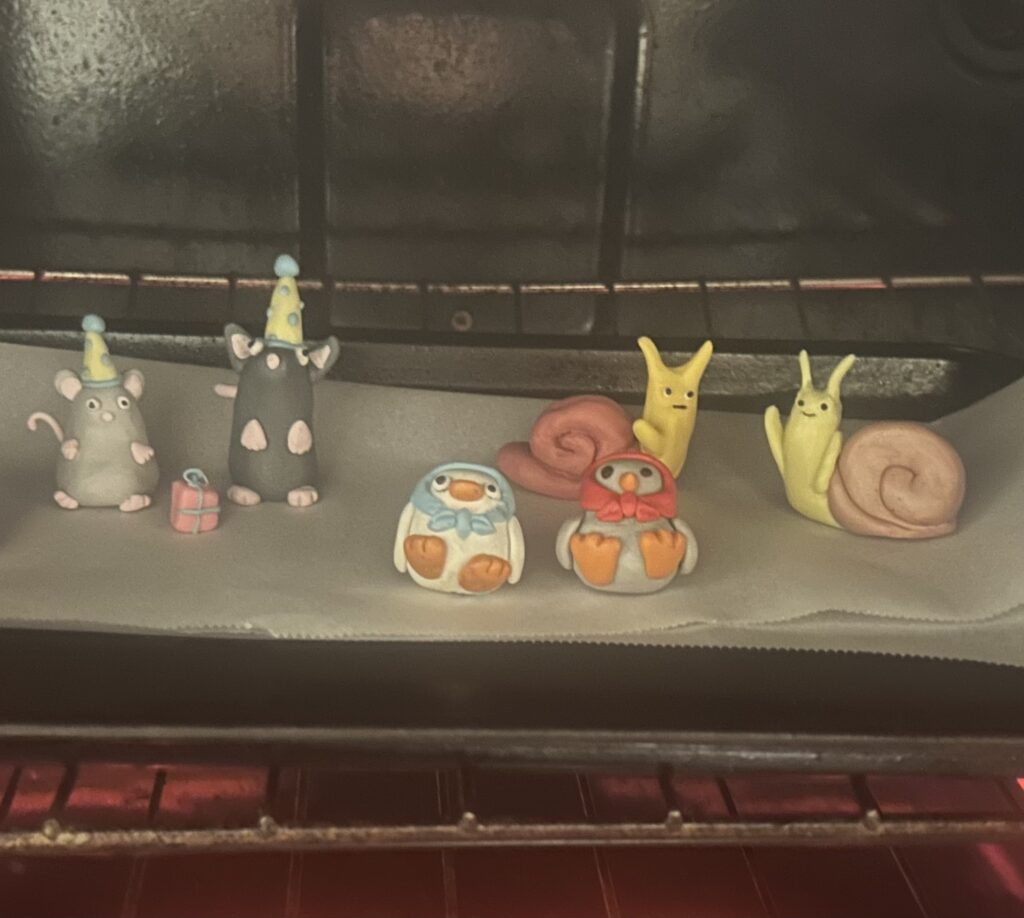
This week for my art inquiry, my partner and I made polymer clay animals! It was such a fun and hands-on experience that allowed us to explore sculpting, creativity, and fine motor skills.
What is Polymer Clay?
Polymer clay is a versatile, oven-bake modeling material made from PVC (polyvinyl chloride) and plasticizers. It remains soft until baked, allowing artists to mold and shape it into intricate designs. Once cured in an oven, polymer clay hardens into a durable, lightweight form, making it perfect for sculptures, jewelry, and decorative crafts.
Gloss glaze or varnish (optional, for a shiny finish)
Steps to Making Polymer Clay Animals:
Look Up Animals on Pinterest: Before starting, we searched Pinterest for inspiration and decided on the colors and details.
Condition the Clay: Polymer clay needs to be softened before sculpting. We kneaded it thoroughly to make it pliable.
Shape the Basic Forms: We started with simple shapes—spheres for heads, cylinders for bodies, and smaller pieces for legs and tails.
Add Details: Using sculpting tools and toothpicks, we added texture for fur, scales, or facial features.
Assemble the Parts: We carefully attached different parts of our animals, blending seams to make them look seamless.
Bake the Sculptures: Following the instructions on the polymer clay packaging, we baked our sculptures at the recommended temperature.
Finishing Touches: Once cooled, we added a glossy varnish for shine and extra durability.
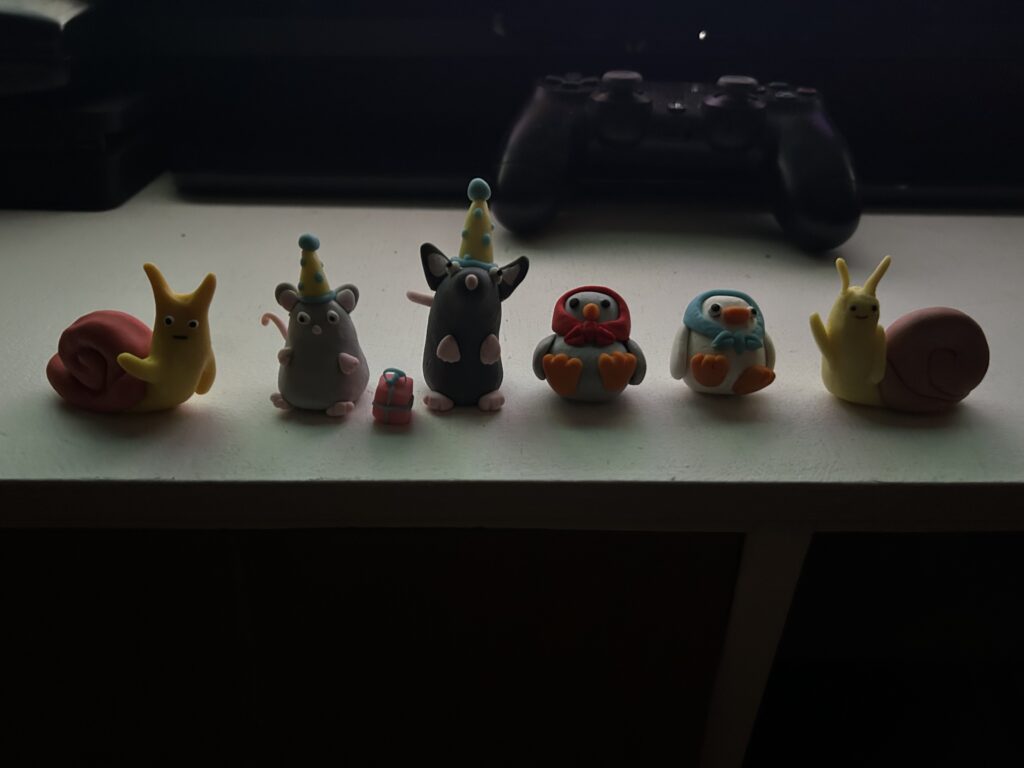
Final Results
It was exciting to see our creations come to life! Working with polymer clay allowed us to experiment with different textures and forms while honing our artistic skills. This project was a great reminder that art can be both playful and technical, offering endless possibilities for creativity.
This week, we had the opportunity to hear from two incredible guest speakers: Kaori Lau and Tracy Humphreys. Their presentation on technology and inclusion in the classroom reminded me of the challenges that students with disabilities face and the role educators play in fostering accessibility.
We started the session with an interactive sticky note exercise. Each of us received a different-colored sticky note, and the speaker called out specific colors, stating that those students “couldn’t participate because…” It was a powerful demonstration of exclusion—representing the barriers that disabled students experience in education. Seeing how many people were left out made me feel deeply upset. It reinforced how exclusion can make students hesitant to ask for the support they need due to fear of being seen as different.
The Work of BCEdAccess
BCEdAccess is a volunteer organization dedicated to advocating for students with disabilities and promoting social inclusion. Their work highlights how many children are excluded in classrooms, not just physically but also through systemic barriers that impact their personal identity, sense of belonging, and access to education. As an aspiring teacher, this presentation made me reflect on the kind of educator I want to be. I don’t want to unintentionally reinforce ableism or exclusion. Instead, I want to be someone who actively works to ensure all students feel seen, heard, and valued.
Understanding Barriers and Systemic Challenges
One of the major takeaways from the presentation was the complexity of accessing support for students with disabilities. School districts apply for designations through the Ministry of Education, which determines funding based on need. Funding is categorized into three levels, covering physical disabilities, autism, and mental health. However, the process to receive an assessment can take up to two years—an unacceptable delay that significantly impacts students’ education and their families’ lives. Families who seek private assessments often face immense financial barriers, further deepening the inequities in our education system. These delays create significant gaps in learning and access to necessary support, making early intervention incredibly difficult.
Technology as a Tool for Inclusion
Despite these challenges, technology has the potential to bridge accessibility gaps for students with disabilities. Some of the assistive technologies discussed included:
Google Read & Write – Supports students with reading and writing difficulties
iPads & Speech-to-Text – Helps students who struggle with written communication
Nova Chat & Touch Chat – Alternative communication tools
Sound Field Systems & Microphones – Supports students with auditory processing challenges
Translation Tools & Subtitles – Enhances accessibility for multilingual learners
While these tools are transformative, challenges remain, including lack of access, lack of training for educators and families, and resistance to change. Privacy concerns and debates over whether technology is a distraction further complicate the issue.
Overcoming Challenges: Solutions for a More Inclusive Classroom
One of the key messages from the presentation was the importance of advocacy and collaboration. Some solutions included:
Advocating for better funding, loaner programs, and grants
Including assistive technology in IEPs (Individual Education Plans)
Providing training for families and teachers on how to use assistive technology effectively
Ensuring compliance with privacy laws and establishing clear policies for assistive technology use
Normalizing assistive technology to reduce stigma and promote inclusion
Technology, Exclusion, and Responsible Use
As technology continues to evolve, we must ask ourselves: Who is still being excluded? How can we ensure technology is a bridge to opportunity rather than another barrier? Educators, parents, and schools must work together to ensure technology is implemented responsibly. While AI and gamification have exciting possibilities, they also bring ethical concerns that must be considered. Teaching digital literacy is essential to help students use these tools effectively and responsibly. Confronting Ableism in EducationOne of the most impactful parts of the presentation was the discussion on ableism—the systemic and cultural discrimination against people with disabilities. Ableism manifests in many ways, from questioning whether a student is “disabled enough” to assuming that the goal is for students to be independent of assistive technology. These biases create unnecessary barriers for students and reinforce harmful narratives about disability. A book recommendation that came up was Out of My Mind by Sharon M. Draper, which explores the lived experiences of a nonverbal student. This book, along with resources like BCEdAccess and the Exclusion Tracker, can help educators recognize and address ableism in the classroom.
Building a More Inclusive Classroom To support all students, teachers must use a variety of strategies, including:
Movement breaks
Peer support and leadership opportunities
Playing to students’ strengths and interests
Building a community of practice through collaboration with district and provincial resources
Connecting with advocacy groups like BCEdAccess for guidance and support
Ultimately, fostering an inclusive classroom means being proactive, adaptable, and willing to learn from students and families. This presentation reinforced my belief that inclusion isn’t just about meeting legal requirements—it’s about creating an environment where every student feels valued and empowered to succeed. I’m leaving this week feeling both challenged and inspired. As a future educator, I want to ensure that my classroom is a space where all students—regardless of ability—have access to the tools and support they need to thrive.
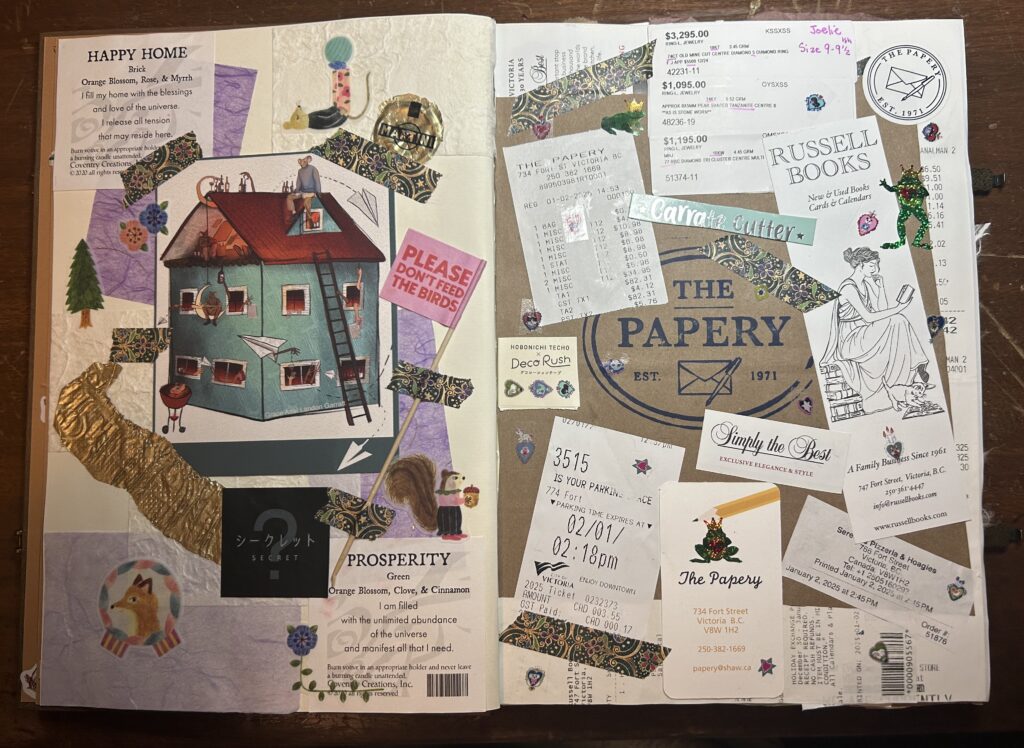
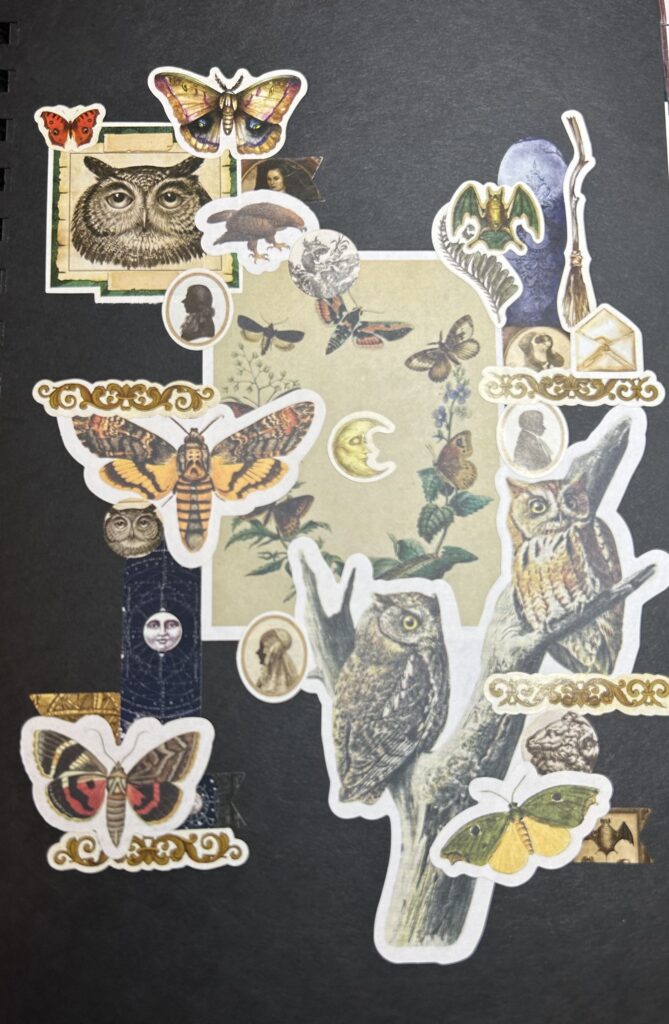
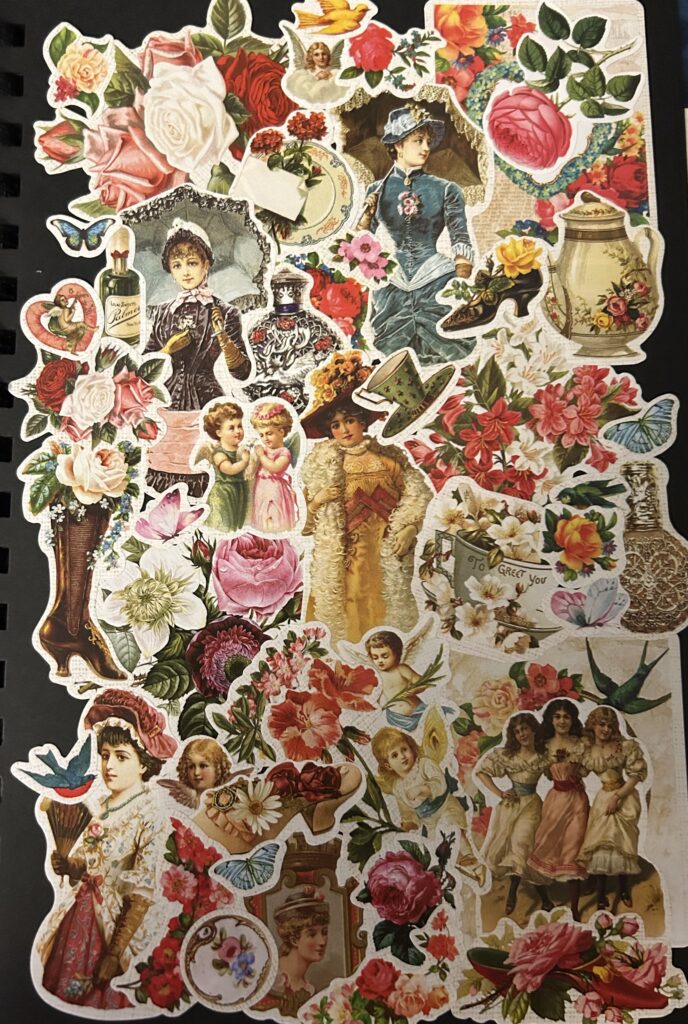
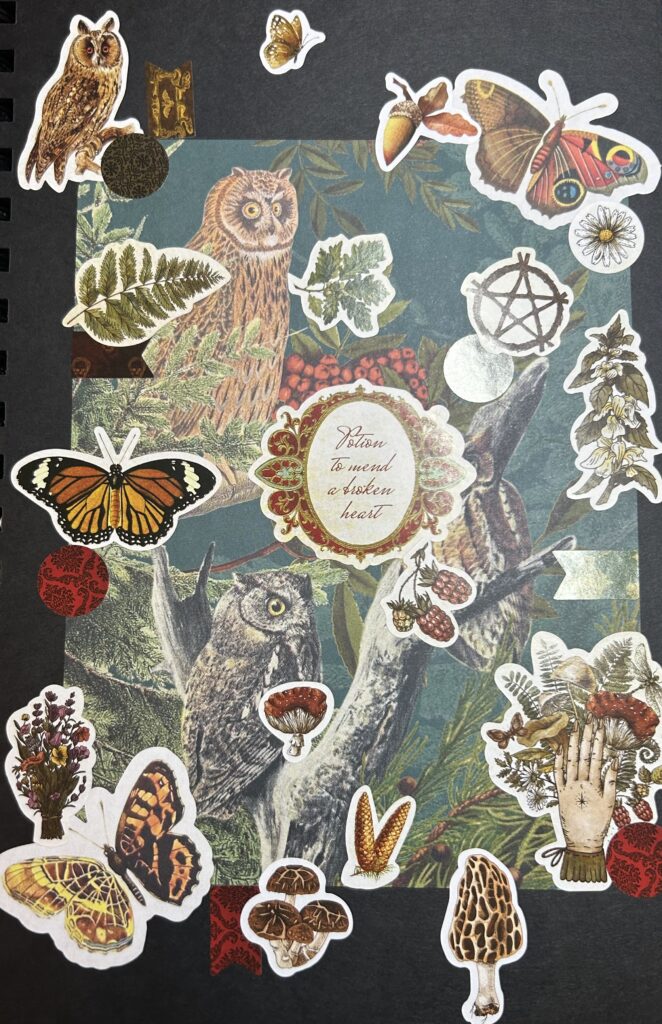
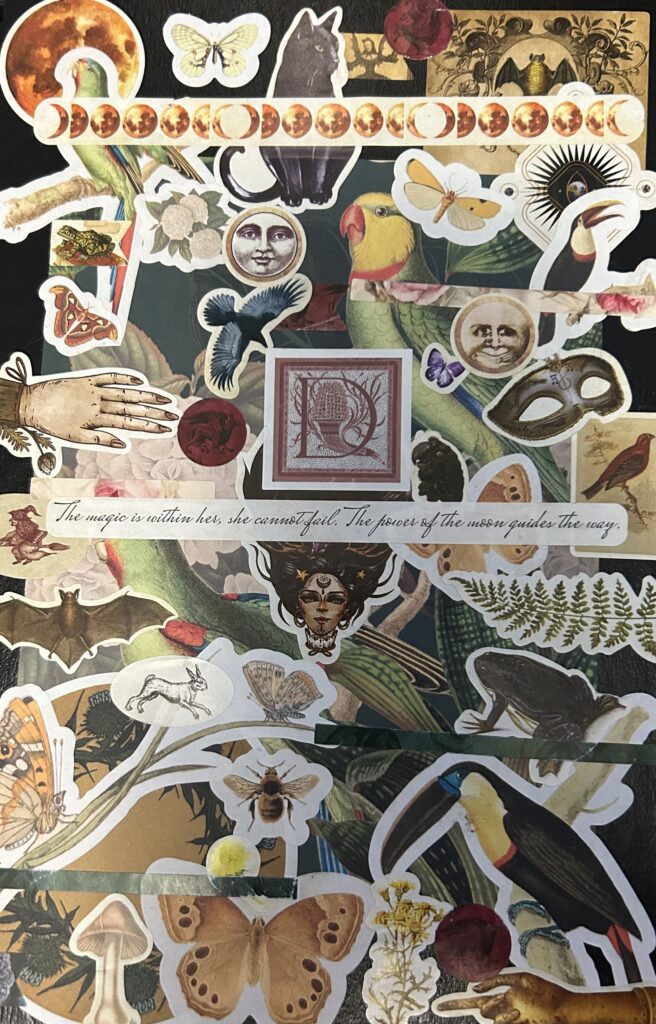
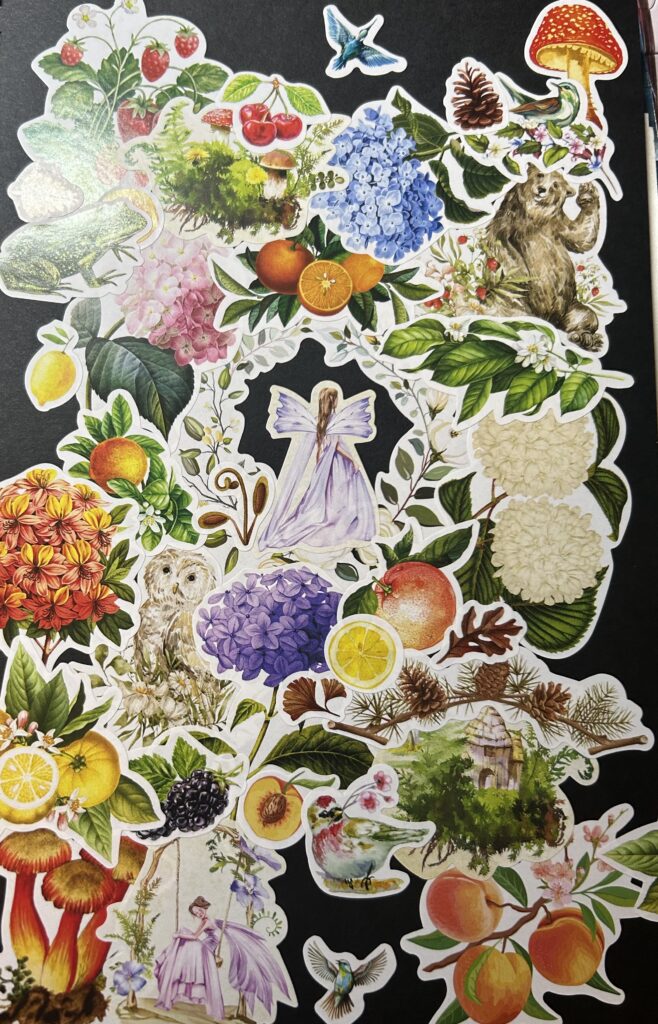
Over the last few weeks, I have been playing around with sticker collaging! I absolutely love stickers, so I wanted to experiment with using them to create layered and textured collages in my journal.
What is Sticker Collaging?
Sticker collaging is the process of creating layered, textured artwork using a variety of stickers. Instead of traditional collage methods like cutting and pasting magazine images or paper, sticker collaging uses stickers as the main medium to build a visual story or aesthetic. You can layer stickers, combine different themes, and even mix them with other materials like paint, washi tape, or pressed flowers to add more texture and depth.
Materials I Used
Here’s what I used to get started with my sticker collages:
Journal – Any sketchbook or journal works great! I used a black blank-page journal to give myself more freedom with layout and design.
Sticker Books – I primarily used:
📖 Ephemera Sticker Book– Filled with vintage-style stickers like old letters, tickets, and maps.
📜 Antiquarian Sticker Book – Packed with unique and whimsical stickers that are perfect for layering.
Scissors (optional) – If you want to cut stickers or trim edges.
Washi Tape (optional) – Great for adding extra texture and framing your collage.
Sticker Book Recomondations
Steps to Create a Sticker Collage
1. Gather Your Stickers and Journal Start by flipping through your sticker books and pulling out stickers that inspire you. You can create a theme (like nature, vintage, or celestial) or simply choose stickers that catch your eye.
2. Plan Your Layout (Optional) If you like planning, lay out a few stickers on your journal page without sticking them down yet. This will give you an idea of how your collage will look. If you prefer to be spontaneous, go ahead and start sticking!
3. Start Layering Begin with your larger stickers or background stickers (like old letters, postcards, or patterns). Stick them down first to create a base layer. Next, layer smaller stickers on top to build dimension. Try overlapping stickers or letting some stickers peek out from behind others to create visual interest.
4. Add Texture and Details If you have washi tape, pressed flowers, or small paper scraps, you can add those elements to your collage for extra texture. I love using washi tape along the edges to frame my collage.5. Fill in Blank Spaces If there are any awkward blank spaces, use smaller stickers like butterflies, stamps, or florals to fill them in. This helps make your collage feel complete and balanced.
This week in class, we had a discussion about Artificial Intelligence (AI) and its growing presence in education, creative industries, and everyday life. I’ve heard a wide range of perspectives on AI — some people are very against it, while others encourage students and individuals to experiment with it and learn how to use it. Personally, I see AI as a tool — something that can assist in certain areas but should not be relied on to do all the work. It’s important to strike a balance and consider the broader implications AI might have on people, creativity, and the world.
AI Tools and Resources We Discussed
During our discussion, we explored various AI platforms and tools:
Google Labs: This platform allows users to experiment with AI, including creating images. Below are some of my results from playing around with google labs.
AI Image Generators: Tools like DALL-E and Midjourney can create highly realistic images from text prompts.
AI Video Generators: Platforms like Sora and HeyGen generate videos from text descriptions, allowing users to create realistic video content without traditional filming.
Notebook LM: An AI tool designed to help organize and summarize research, notes, and documents.
Grammarly and Writing Tools: AI programs that help with grammar, spelling, and writing structure.
How I’ve Used AI
Reflecting on my own experiences, I realized I’ve already used AI in a couple of ways throughout my academic journey:
Grammar and Spelling Assistance: In the beginning of my degree, I frequently used Grammarly to check my grammar and spelling in essays and assignments.
Essay Outlines and Study Guides: I’ve also used AI to help generate writing outlines or templates for essays and projects, especially when I felt stuck. It’s been helpful in creating study guides or summarizing complex concepts.
Entertainment Recommendations: One of my favorite uses of AI has been asking ChatGPT for personalized movie, book, or music recommendations. For example, I could prompt it with something like “I’m looking for a cute, feel-good movie similar to Wes Anderson’s style” — and I often found it to be very successful in curating recommendations based on my taste.
Concerns and Challenges with AI
Although AI can be a useful tool, I’ve also developed some strong concerns about its impact on creativity, education, and society at large:
AI-Generated Art: One of my biggest challenges with AI is its use in creating art. Art, to me, is a deeply human experience — it’s an expression of emotion, culture, and individuality. Having AI generate art feels like it’s taking work away from real artists who have dedicated time and skill to their craft. It raises the question: Should we let machines replace human creativity?
Distortion of Reality: AI-generated videos and voice replication have made it increasingly difficult to differentiate between what is real and what is fake. This is particularly concerning when it comes to misinformation, deepfakes, and fabricated news. I’ve seen examples of AI replicating someone’s voice to make them say things they never actually said — and as an adult, I found it difficult to tell the difference. This could be especially harmful for children who may not have the skills to critically analyze what they see online.
An Easy Way Out: Another concern I have is that AI can offer an easy way out — allowing people to bypass the hard work and critical thinking required for learning. For example, students may rely on AI to write their essays or complete assignments without actually understanding the content. This could significantly impact their ability to think critically, problem-solve, and engage with the material.
Environmental Impact: AI consumes a significant amount of energy and water, contributing to environmental damage. It’s easy to overlook these impacts when we’re simply sitting in front of a computer, but the environmental cost is real. Instead of channeling resources into powering AI, those resources could be redirected toward helping real people and addressing global challenges.
Bias and Lack of Diverse Perspectives: AI tools are trained on existing content, which often reflects dominant cultural narratives, biases, and stereotypes. This means AI-generated content can perpetuate racism, sexism, and westernized ideals. I often wonder — what worldviews does AI promote? And how is this influencing people, especially young students, who may not realize the biases embedded in the content AI produces?
Final Reflection
Overall, my feelings about AI remain complex. It’s clear that AI has the potential to be a helpful tool, but it also comes with significant risks. I worry about the long-term impact of AI on human connection, creativity, and education. Will students lose the ability to think critically if AI does the work for them? Will human-to-human interactions diminish as AI becomes more integrated into our lives? And what will the environmental cost be as we continue to power AI technologies?