Welcome to my Wordpress Account!

Author: delilahscavarda (Page 2 of 2)

Junk Journaling

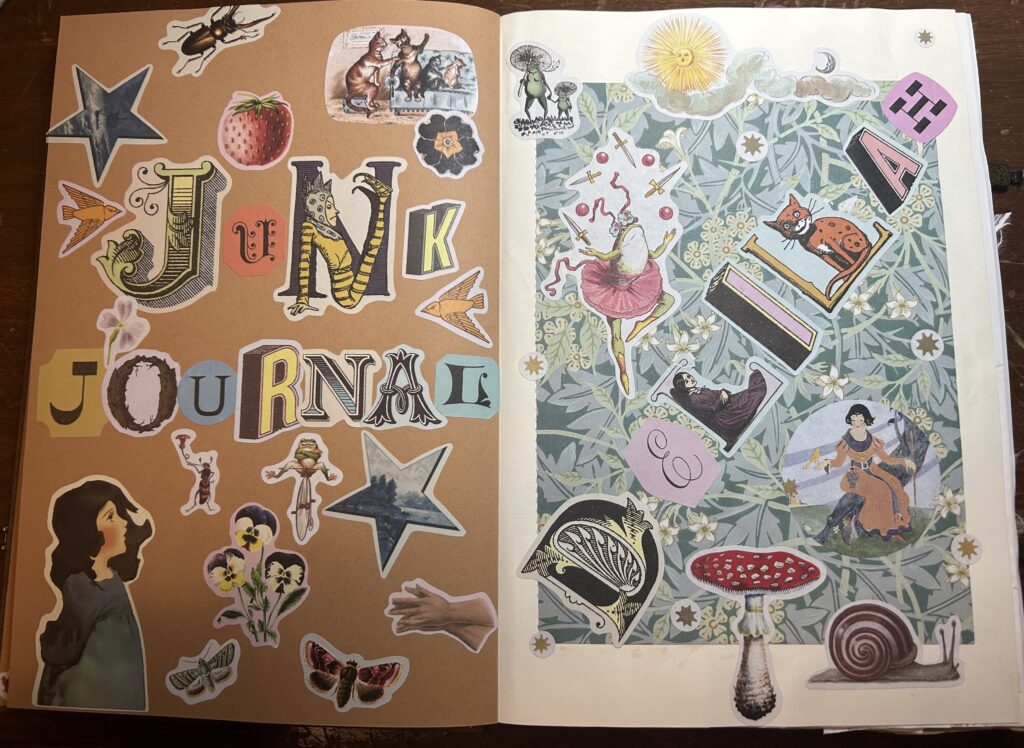
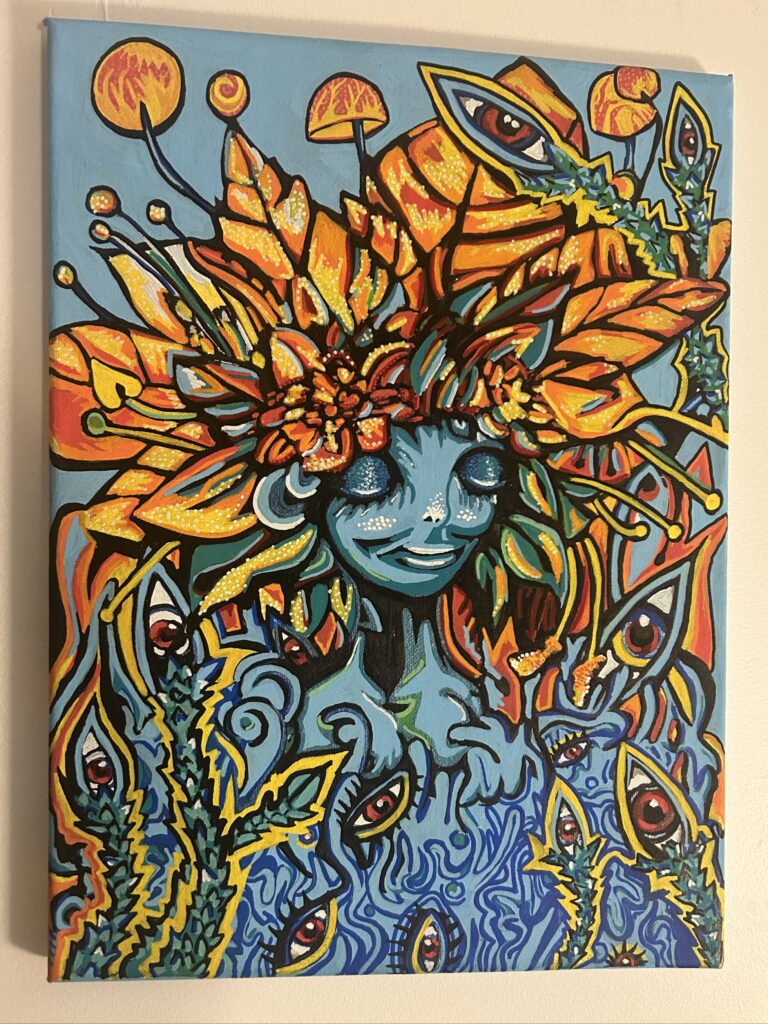
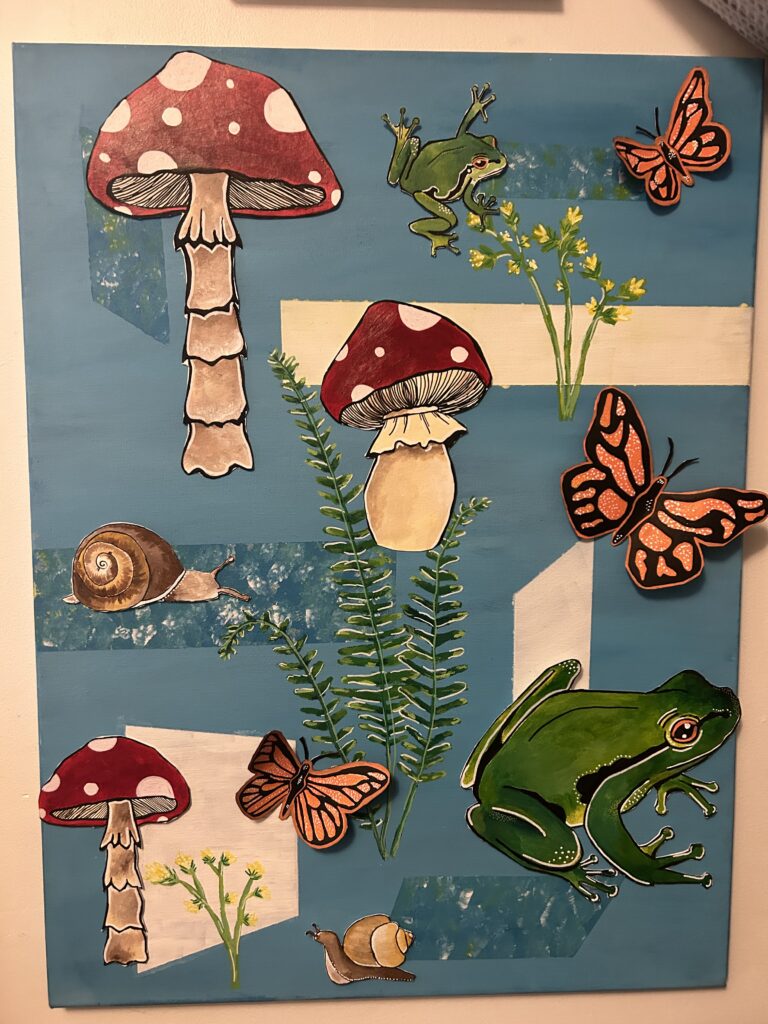
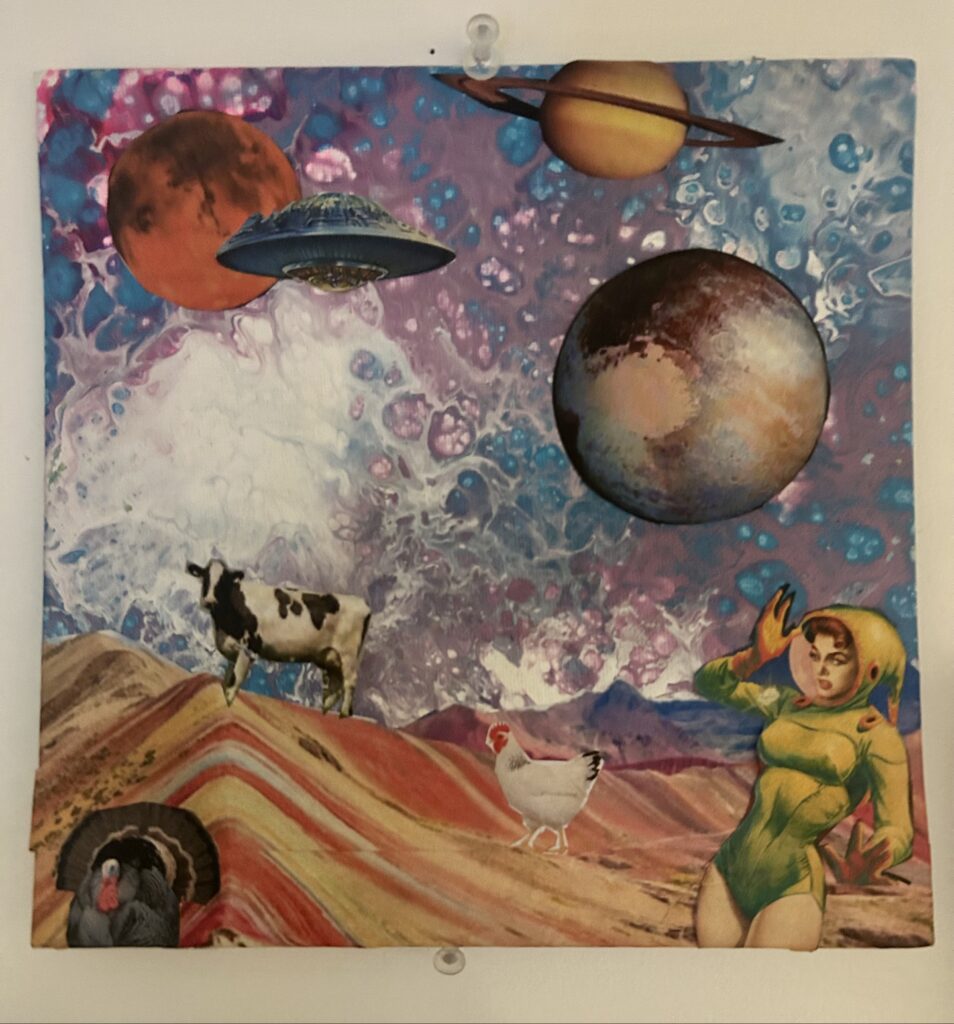
Over the past few weeks, I’ve been immersing myself in junk journaling, creating collages with materials gathered from my daily life!

What is Junk journaling?

Junk journaling is a creative and expressive way to capture memories, thoughts, and inspiration by repurposing everyday items. Blending elements of scrapbooking, journaling, and collage, it transforms found objects into unique and deeply personal pages.

Junk journal tutorial

Materials Used in Junk Journaling:
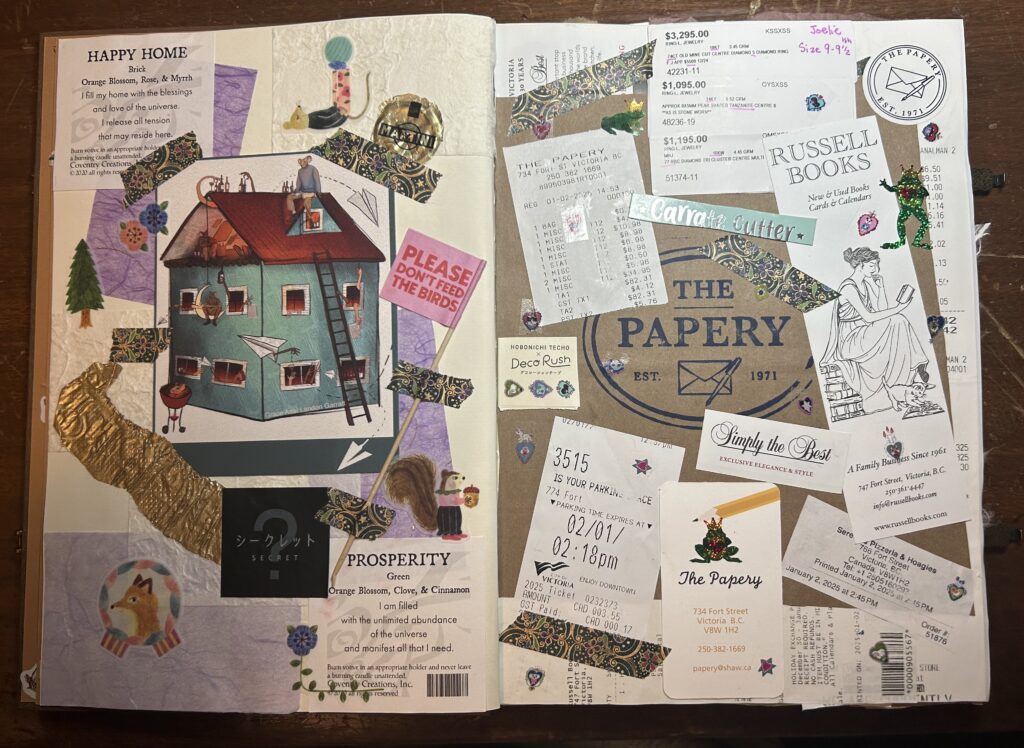
  • Paper Scraps ā€“ Old book pages, magazine clippings, newspaper, wrapping paper, and maps.
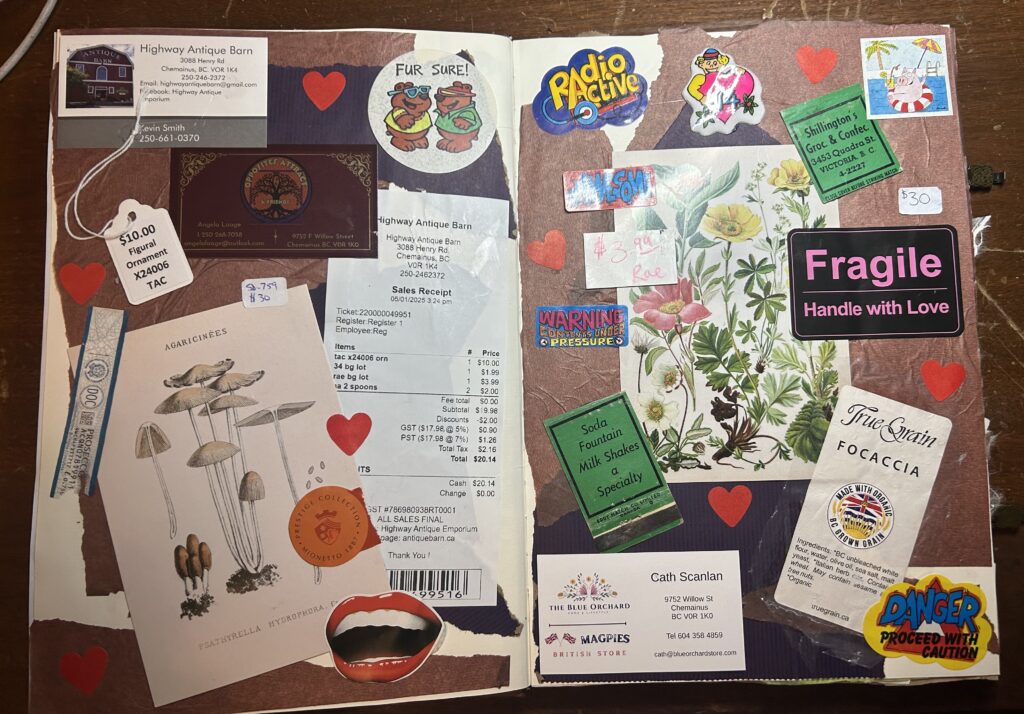
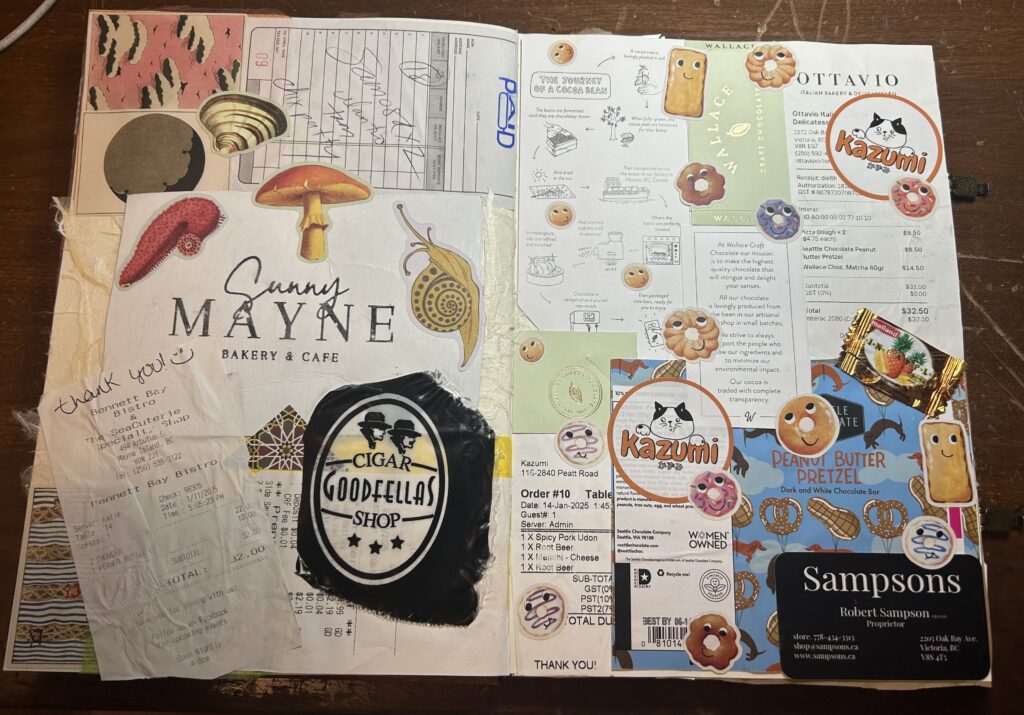
  • Ephemera ā€“ Tickets, postcards, receipts, letters, and tags.
  • Fabric & Textiles ā€“ Scraps of fabric, lace, ribbon, or pressed flowers.
  • Writing Tools ā€“ Pens, markers, stamps, stickers, and washi tape.
  • Adhesives ā€“ Glue sticks, double-sided tape, and Mod Podge.

Steps for Junk Journaling:

  1. Collect Materials ā€“ Gather interesting paper, notes, or textures from your daily life.
  2. Choose a Theme ā€“ Decide on a mood, memory, or idea for your page.
  3. Layer & Arrange ā€“ Experiment with layouts, layering different textures and materials.
  4. Glue & Secure ā€“ Once satisfied with the design, adhere pieces to the page.
  5. Add Writing & Details ā€“ Include journaling, doodles, or embellishments to personalize.
  6. Review & Reflect ā€“ Flip through your pages, appreciating the stories they tell.

EdCamp Reflection: Cultivating Ideas for a Class Garden

This week, we participated in an EdCamp, a user-generated conference often called an ā€œunconference.ā€ Unlike traditional professional development, EdCamps are free, open to all, and entirely participant-driven. Anyone can propose a topic, and you don’t need to be an expert—just passionate about an idea. A key feature is the ā€œRule of Two Feetā€, which encourages participants to move freely between discussions that interest them, making the experience informal, flexible, and engaging.

In my small group, we explored the idea of creating a classroom garden. We discussed easy-to-grow plants that students could take home, mushroom-growing kits to observe mycelium in action, and the importance of making it truly student-centered. Instead of relying on parents to do the work, students would take ownership, learning through hands-on experiences.

We also considered funding options like grants and volunteers and how a class garden could be deeply cross-curricular, integrating science, art, and Indigenous education. Even in classrooms without outdoor space, indoor plants could provide similar benefits, including improving mental well-being.

After doing some research I found a really cool resource called “Farm to School BC”. Farm to School BC is a program that supports schools in British Columbia in integrating healthy, local, and sustainable food systems into their communities. The website provides resources on school gardens, local food procurement, farm connections, and food literacy education to help educators and students engage with fresh, locally grown food. Key features include guides for starting school gardens, lesson plans, funding opportunities, and community partnerships to promote hands-on learning and food sustainability. The program emphasizes student engagement, Indigenous food knowledge, and environmental stewardship, encouraging schools to create meaningful connections between food, learning, and community well-being.

Reflections on Online Learning and Influential Media in Education

This past week’s class got me thinking about the pros and cons of virtual learning. As someone who has experienced both online and in-person classes, I’ve come to appreciate the unique benefits and challenges that each format presents.

The Pros and Cons of Online LearningOnline learning has become an integral part of education, offering convenience and flexibility. One of the biggest advantages is the ability to attend class from home. There’s no commute, which saves time, and it’s easier to take notes and follow along with slides. I’ve also noticed that attendance tends to be higher in online classes—perhaps because it removes barriers like transportation or scheduling conflicts. Another great aspect is the ability to bring in guest speakers from anywhere in the world. In a past class, I remember students attending from as far as China, making for a diverse and engaging learning environment.

However, online learning isn’t without its downsides. Group discussions can sometimes feel awkward, and there’s often a hesitation to turn cameras on, something that has frustrated professors in the past. Distractions at home can also be an issue—I know I’ve caught myself getting sidetracked more than once. And then there are the inevitable technical difficulties, like professors struggling to unmute themselves or slides not loading properly.

In-Person Learning: A Different Dynamic Being in a physical classroom brings an energy that’s hard to replicate online. It’s exciting to engage in face-to-face discussions and try out new learning experiences. Guest speakers can still make an impact, and there’s something about being in a room full of people that fosters spontaneous discussion and connection.

Yet, there are challenges to consider. Not everyone has reliable access to technology or the internet, which can create accessibility issues. In a household with young children, someone might need to be home to supervise them, making online learning difficult. Distractions can still be present in-person, whether it’s side conversations or environmental noise.

The Power of Influential Media in EducationThroughout my education, influential media has played a huge role in shaping my learning. Growing up, Bill Nye the Science Guy was a staple in science classes. His experiments were exciting, engaging, and made science feel fun and accessible. Whenever an episode was shown in class, it was something to look forward to. Bill Nye is a figure that most people recognize, and his ability to make complex topics digestible is something that still sticks with me.

As an adult, my exposure to influential thinkers expanded. KimberlƩ Crenshaw has been particularly impactful in my gender studies degree, helping me understand intersectionality and its implications in society.

Educational media has also introduced me to powerful documentaries like Angry Inuk and Kanehsatake: 270 Years of Resistance. These films have transported me to new perspectives, providing firsthand Indigenous narratives and shedding light on protest movements that are often overlooked.

One of the greatest strengths of media in education is its ability to make learning memorable. Documentaries, lectures, and educational shows offer ways to engage with material beyond traditional readings. They allow us to step into different worlds, learn directly from the people whose stories need to be heard, and move beyond a Western-centric perspective.

Pastels

This week, I experimented with pastels! I have some experience with them and have previously painted various fruits and vegetables. Wanting to expand my collection, I decided to draw a pomegranate. Below are two of my past works.

What is pastel painting?

Pastel painting is a technique that uses soft, pigment-rich sticks to create vibrant, textured artwork. Pastels blend easily, allowing for rich color layering and smooth transitions. Artists can use them for both bold, expressive strokes and delicate shading. Unlike traditional paint, pastels don’t require drying time, making them a versatile and immediate medium for artistic expression.

Pastel Tutorial

Materials Used

  • Oil pastels 
  • Canvas 
  • Paint Pens

Process

To create my pastel painting of a pomegranate, I started by looking for inspiration on Pinterest, gathering references to guide my composition and color choices. Once I had a clear vision, I lightly sketched the outline with a pencil to map out the basic shapes.

I began the painting process by layering the darkest colors first, establishing the shadows and depth. Gradually, I added lighter colors, blending them with my fingers to create smooth transitions. I continued building up layers, refining the details and adjusting the tones until I was happy with the overall look.

Once the pomegranate felt complete, I moved on to the background, carefully adding color to complement the subject. To finish the piece, I used paint pens to highlight key areas and add small stars in the background, giving the painting an extra touch of detail and vibrancy.

Audio Video Lab

This week we had a guest visitor to help teach our class about how to use iMovie and the software Audacity. I learned some essential skills for creating high-quality video and audio content. The class was also introduced to the library resources, including the “Ask Us” desk at UVIC where students can borrow gear and use the podcast room, which can be booked in advance.

In class we has the opportunity to practice editing videos below are some examples.

In the goat video above I learned how to add a title, add transitions, end credits as well as how to add music. I learned some helpful tips for video editing, such as how to ā€œscrubā€ through the video using the spacebar to stop and navigate efficiently.

In the above bike clip I learned how to add an intro transition, how to slow down part of the video, add sound and how to make it fade into black.

In my own time I decided to make a stop motion with clay! I used iMovie to add in sound and transitions.

Multimedia Learning Theory and Graphic Creation Tools

In this week’s class, we discussed the Multimedia Learning Hypothesis, which explains that people learn more effectively from words and pictures together rather than from words alone. This idea is based on dual coding theory, which suggests that the human mind processes information through two separate channels—one for visual information and one for auditory information. Since each channel has a limited capacity (cognitive load), combining them thoughtfully can enhance learning.

We also talked about how learning is an active process of filtering, selecting, organizing, and integrating information based on prior knowledge. For example, understanding how a bicycle pump works is much easier when a diagram accompanies the explanation rather than relying on text alone. Graphics help make complex or unseen concepts more accessible and improve comprehension.

Some key takeaways from class:

  • Spatial Contiguity Principle – Students learn better when related words and pictures are placed close together on a page or screen.
  • Using graphics effectively – Color coding, diagrams, and annotations can enhance understanding.
  • Creating graphics for teaching – We explored tools like Photoshop, Illustrator, GIMP, PowerPoint, and Google Slides to create visuals for worksheets and lessons.

Overall, I found it really interesting to see how well-designed visuals can make learning more engaging and effective. Below I experimented with creating some graphics using Canva and create a meet the teacher page and my own little logo.

I also tried using Microsoft Designer to create an AI colouring page. The prompt I used was “Grade two class salmon cycle” this is what is created. Even though it did not really generate the salmon cycle, I thought this would be a cool tool to create interesting colouring pages as younger grades love doing colouring books!

Linocut Printmaking

This week, I experimented with linocut printmaking! I have some prior experience with this technique from an undergraduate class, where I created a simple design. This time, I wanted to challenge myself by creating a more intricate and cohesive piece. Inspired by my love of frogs, I set out to bring my design to life through linocut printing.

What is Linocut Printmaking?

Linocut is a form of block printing where a design is carved into a linoleum block. Ink is then applied to the surface, and the block is pressed onto paper to create a print. The carved areas remain ink-free, allowing the design to stand out.

Linocut Tutorial

Materials Used (All purchased at MONKS):

  • Speedball Speedy-Cut Block (4″ x 6″)
  • Speedball Lino Cutter
  • Speedball Water-Soluble Block Printing Ink
  • Tracing Paper
  • Newsprint Paper

Process:

  1. Finding Inspiration – I gathered reference images from Pinterest to help develop my design.
  2. Sketching the Design – I drew my image on tracing paper, making it easier to transfer and visualize the areas to carve.
  3. Transferring the Image – Placing the tracing paper over the linoleum block, I pressed firmly with my palm to transfer the drawing (keeping in mind that the image will be reversed in the final print).
  4. Carving the Block – Using a lino cutter, I carefully carved where the pencil lines were, ensuring the design stood out.
  5. Inking the Block – I rolled a thin layer of black ink onto a glass plate and evenly coated the roller, avoiding excess ink buildup.
  6. Printing the Design – I rolled the ink over the carved block, then pressed the block firmly onto a sheet of paper. Using my hands, I applied pressure before carefully peeling the block away to reveal the final print!

I loved experimenting with this process again and am excited to continue refining my technique. Each print has its own unique texture and character, making linocut a rewarding and dynamic art form!

Rediscovering Creativity: A Journey Through Weekly Art Practices and Exploration

Inquiry Question: How can dedicating time to weekly art practices and exploring various artists, techniques, and materials help me reconnect with my creativity, discover new ways of making art, and develop a sustainable and fulfilling art practice?

For my Inquiry project, I want to explore different approaches to creating art. Art has always been a passion of mine, but with the busyness of school, I often find myself neglecting my art practice. This project will give me the opportunity to intentionally set aside time each week to engage with art and reconnect with my creativity.

As part of this exploration, I will research and draw inspiration from various artists and art tutorials. Each week, I will document my journey by sharing photos of the art projects I’m working on or have completed. I’ll also include details about the resources that inspired me, the materials I used, and the techniques I experimented with.

Through this process, my goal is to develop my skills, discover new ways of making art, and build a consistent art practice that is both fulfilling and sustainable.

Below I have provided some of my previous art projects.

Teacups – Inspired by the textures and patterns found in nature, I crafted these teacups using a pottery wheel. I glazed them with a rich green and brown glaze, evoking earthy tones reminiscent of natural elements.

In Bloom – One of my first experiments with monoprinting, this piece was created using a gel pad. I layered paint and pressed flowers onto the surface, capturing their delicate details and natural textures in an organic, ethereal composition.

Painted Lady – Using paint pens, I created this surreal painting, layering intricate details and bold colors to bring the composition to life.

Into the Forest – This mixed-media piece combines traditional acrylic painting with paint pens to add depth and texture. To enhance the composition, I painted animals and insects on cut-out pieces of construction paper and layered them onto the canvas, creating a dynamic, three-dimensional effect.

Caught in Space – For the background of this collage, I used a paint pour technique to create a fluid, cosmic effect. I then layered magazine cutouts to construct a dynamic space-themed composition.

Garlic – This still life was created using pastels, capturing the organic form and subtle color variations of garlic with soft, blended textures.

Open Educational Resources

This week in class, we discussed Open Educational Resources (OER). These are educational materials that are accessible online and openly licensed, allowing users to retain, reuse, remix, revise, and redistribute them. I believe OER is incredibly beneficial, particularly for new teachers, as it provides inspiration and serves as a helpful starting point for lesson and activity planning.

When I first learned about OER, it made me feel more confident about creating lessons and activities. As someone with no formal teaching experience yet, exploring OER has given me inspiration and ideas for topics I might want to teach in the future. However, I think it’s important not to use these resources as-is but to adapt and personalize them to fit your teaching style and your students’ needs.

In another class, it was pointed out that some OER materials may not align with the BC curriculum. This makes it especially important to review and revise them to ensure they meet the required standards. Editing these resources allows teachers to make them more relevant and tailored to their specific educational goals.

Overall, OER provides an invaluable resource for educators at all levels. It encourages collaboration, creativity, and accessibility in education. By thoughtfully adapting these materials, teachers can craft meaningful learning experiences that are both engaging and aligned with their students’ needs and curricular requirements.

Newer posts »